Virtual machines
How to view and manage virtual machines, use local disk space and Databricks workspaces
Note: Virtual Machines (VM) continue to incur running costs if the VM has not been stopped, even when not in use. The ABS recommends users shut down their machine during periods of inactivity to avoid unintended charges. Refer to the VM management options in the SEAD user guide for more details and instructions on shutting down a VM. Disconnecting, or closing your machine window is insufficient to avoid running costs.
Viewing virtual machines
Navigate to the Virtual Machines page by clicking on the tab from the left navigation panel.

Fig. 1. Navigating to Virtual Machines
From the Virtual Machines page, you can view the list of all VMs in SEAD and view their power state, status, type, who they are assigned to and the name of the project they’re associated with. You can also adjust the filters (circled blue) to search for a specific VM based on various criteria or download a report of all the listed VMs by clicking Export (circled red).

Fig. 2. Virtual Machines page
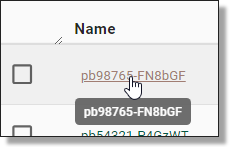
To view a specific VM, click on its hyperlinked name.

Fig. 3. Selecting a Virtual Machine
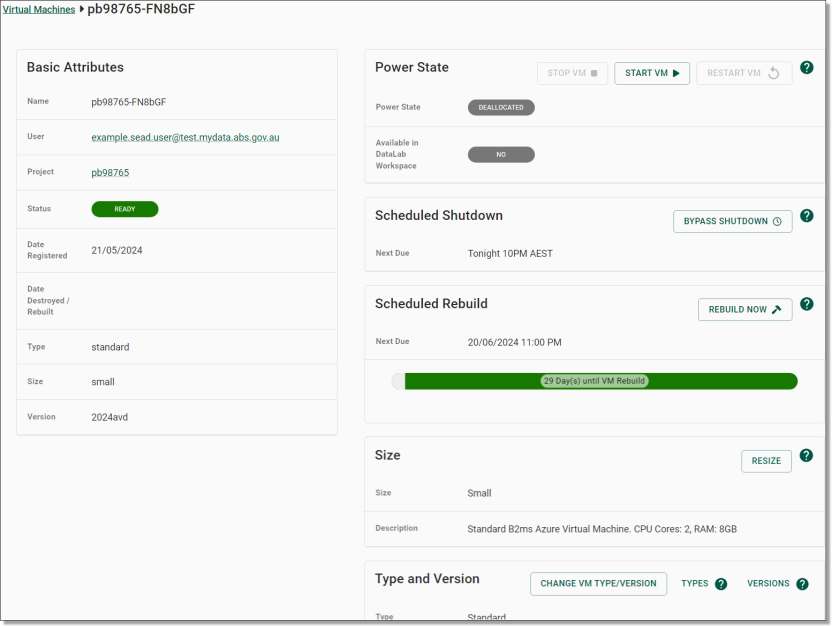
From that specific VM’s page, you can view information about it in more detail, such as how many days are remaining until its next rebuild, the local disk attached to it and its next scheduled shut down. From this page you can also Start, Stop, Bypass Automatic Shutdown, or Resize the VM by clicking on the labelled purple buttons.
NOTE: If a user requires a machine larger than XX-Large, administrators will need to remove the user from their project to destroy their current machine, as the system may not allow the selection directly from the Virtual Machine page. The user should be notified to save all work to the project/output folders. Once the removal process has completed, the administrator will need to update the projects standard VM size to the required VM size and re-add the user to the project.

Fig. 4. Virtual Machine specific page
Azure Virtual Desktop
SEAD uses Azure Virtual Desktop (AVD) to launch VMs. To view the methods for how users launch their VMs using AVD, refer to the SEAD user guide.
It is the responsibility of the SEAD partner administrator to organise the relevant access through their IT department to enable users with access to the Remote Desktop client version of AVD if neccessary. The Remote Desktop client may be preferred If your users require the use of multi-screen functionality. The remote client may also improve connection stability and VM screen resolution.
For more information on AVD, please refer to Accessing your project workspace on the SEAD user guide.
Virtual machine performance
SEAD administrators can allocate the following machine sizes in the system:
| Name | Windows server | CPU | RAM |
|---|---|---|---|
| Small | Small Windows 10 DSVM | CPU Cores 2 | 8GB |
| Medium | Standard Windows 10 DSVM | CPU Cores 2 | 16GB |
| Large | Standard Windows 10 DSVM | CPU Cores 2-8 | 64GB |
The following larger machines are available; however, charges should be considered with these:
| Name | Windows server | CPU | RAM |
|---|---|---|---|
| X-Large | Standard Windows 10 DSVM | CPU Cores 16 | 128GB |
| XX-Large | Standard Windows 10 DSVM | CPU Cores 32 | 256GB |
| XXX-Large | Standard Windows 10 DSVM | CPU Cores 64 | 504GB |
If users are noticing poor performance, machine size may be a potential reason among others. If system performance issues occur attempt the following with the user:
- Ensure the user has a good, stable internet connection.
- Close and reopen the program in question.
- Confirm project drives have available space, if not attempt to free up space.
- Have the user attempt to restart or rebuild their virtual machine.
- Suggest code or programming segregation.
- Attach a local disk for the user. This is an SSD, and may speed up read/write speeds. Refer to Run jobs offline using local disk space.
Larger machines than those outlined above can be provisioned, these are considered specialised virtual machines capable of supporting machine learning and high-performance computing. You should consider the potentially significant cost implications involved in using these.
- Large GPU Optimised (8 Core CPU, 56GB memory)
- X-Large GPU Optimised (16 Core CPU, 110GB memory)
NOTES:
Before resizing a VM, users should be notified to save their work to project/output folders.
Users will continue to incur system costs on their VM until they click ‘Stop VM’ (or until the next scheduled shutdown).
A user connection error indicates a problem with the user’s network i.e. no internet connection, firewall or web proxy is preventing access.
Users are reminded via email about rebuilds 24 hours prior.
Run jobs offline using local disk space
Users who work across multiple projects can request local disk space through their administrator. This will enable their VM to run jobs offline, however, there is a cost associated with this. Unlike the standard SEAD storage costs where users pay only for the storage they actively use, users will be charged for the amount of local disk space allocated, regardless of whether that storage ends up being used.
For indicative charging please refer to the below table:
| Size | Flat fee per month | Max cost per month |
|---|---|---|
| 32gb | $5.01 | $14.71 |
| 128gb | $20.01 | $52.94 |
| 512gb | $80.02 | $192.32 |
| 1 tb | $160.04 | $345.54 |
The way local disk storage works is datasets are stored on a remote file share. Only the active machine has network access to this location, the inactive VM does not. When running jobs offline, the inactive machine can continue to run a program as it still has access to the data since it is no longer using the remote file share.
To use local disk space, navigate to the Virtual Machine page and select the VM assigned to the user requesting local disk space.

Fig. 1. Selecting a user’s Virtual Machine
From the user's specific VM page, scroll down to ‘Local Disk’ and select the ‘Attach Disk’ button.

Fig. 2. Attach Local Disk button
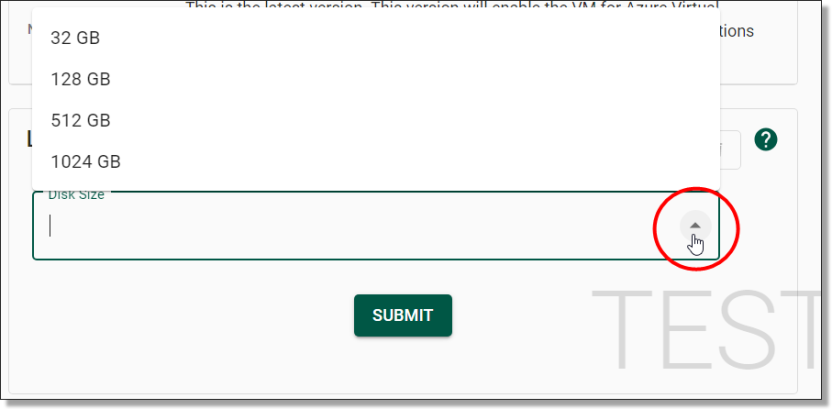
You will then be asked to select the disk size by expanding the drop menu. Once the disk size has been selected, click the ‘Submit’ button to continue.
NOTE: Be aware that larger disk sizes may incur additional charges.

Fig. 3. Disk Size drop menu
You will then be asked to confirm whether you wish to attach a local disk to the VM. Ensure the user has saved their work to project/output folders.

Fig. 4. Confirmation of attaching local disk space
The system will then attach the local disk. You can view the progress of the task via the Action Log.

Fig. 5. Attaching local disk in progress
Databricks
Databricks is a platform available in your SEADpod as a non-standard product for users to undertake data engineering, data science and analytics. Your organisation or area will have agreed to utilise a predetermined number of Databricks workspaces. Like Virtual Machines and storage, administrators can provision more workspaces, but this will incur additional costs. The following information is a basic guide to the capability and provisioning of Databricks in SEAD. There is extensive information about the actual use of Databricks online.
Databricks provides users with an integrated environment to work together on projects, from building and running virtual machine learning tools, to creating interactive dashboards. Databricks also offer a range of tools for data exploration, visualisation and analysis. It can be used to build pipelines for streaming data processing, as well as to create application that can be deployed in the cloud.
Use of Databricks is at the discretion of the business areas managing their projects. Organisations can choose to have Databricks workspaces allocated, however they are not a necessity in an organisations use of SEAD. SEAD has a range of standard tools that are available to users. If users need more storage space or compute power for data processing and analysis beyond what is provided as standard, Databricks is available as an option for SEAD partners to consider.
There is a minimum cost of $2500 to reserve each Databricks workspace. Databricks usage that exceeds the initial $2500 reservation fee will be charged to the SEAD partner during the next invoicing period. The ABS will provide Databricks usage information if applicable, as part of the 6 monthly summary snapshot, or at an agreed interval requested by the SEAD partner.
To enable the Databricks workspace:
- Open the Projects page by clicking on the ‘Projects’ tab from the side navigation panel on the left.
- From the Project page, Click on the hyperlinked project ID to go to the project specific page where you can view the information about it in more detail.
- On the right of your Project page, you will see a Databricks field containing a button that states ‘Enable Databricks’. Click on this button to enable a Databricks workspace for the selected project.
NOTE: Databricks workspaces can be deallocated by SEADpod administrators through this same process.

Fig. 1. Enable Databricks
The SEAD Shared Library has the documentation required for users to setup Databricks Users will also have access to the Databricks Academy training program, which is an online library of Databricks training guides. To access the Databricks Academy, users will need to register an account at https://customer-academy.databricks.com using their mydata.abs.gov.au email address.
The following Databricks cluster policies will be made available to provisioned Project Owner workspaces, utilising all available worker nodes (maximum 5 workers):
| Instance | Server purpose | Max autoscale workers | CPU | RAM/Databricks Units |
|---|---|---|---|---|
| DS3 v2 | General purpose | 5 | 4 | 14GB/0.75 |
| D13 v2 | Memory optimized | 4 | 8 | 56GB/2 |
| F16s v2 | Compute optimized | 4 | 16 | 32GB/3 |
Cluster policies are rules that govern how clusters are created and managed. Nodes are the individual machines that make up a cluster.
Each node has its own CPU, memory and storage resources. Nodes work together to process data in parallel, allowing for faster processing times.
Additional cluster policies can be made available upon request to the ABS, and will be considered on a case-by-case basis. Administrators can monitor costs from the ‘Cost Analysis’ field within the Project page.
NOTE: The ABS provides additional information on appropriate Databricks cost management to end users within the shared library.