Managing projects
How to view, create, and update new and existing projects. How to clone and close projects, and assigning and removing users from projects
Searching for existing projects
From the Projects page you can view a list of all projects ever created in the SEAD environment and basic details about them, such as their start and end dates, status, and a brief description of the project. You can adjust the filters (circled blue) to search for a specific project based on various criteria. You can also download a CSV report of all the listed projects by clicking Export (circled red). Clicking on a project ID (circled black) will take you to the project specific page where you can view the information about the project in more detail.

Fig. 1. Projects tab

Fig. 2. Projects page
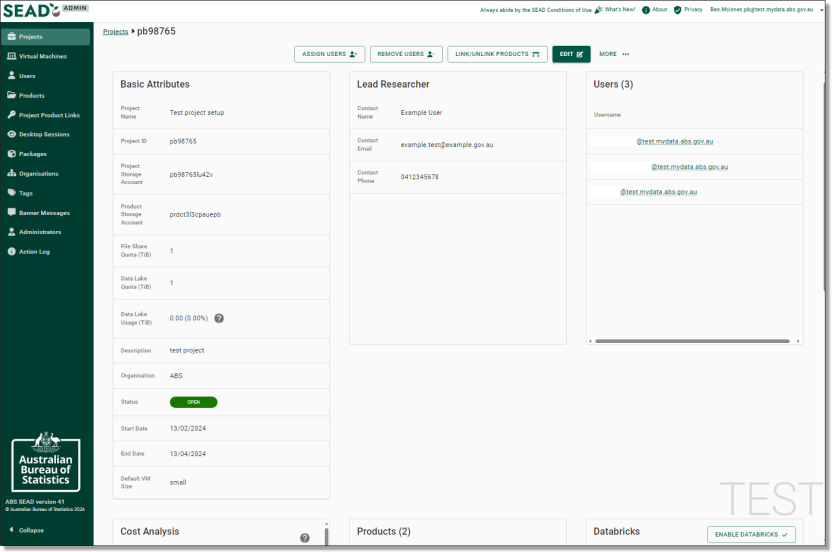
Fig. 3. Project specific page
NOTE: The Lead Researcher is simply a key contact for the project, they do not have different accesses, nor do they receive a VM.
The project specific page also contains a Cost Analysis field. The Cost Analysis field should be considered indicative only (as per Microsoft advice) as final billing is subject to change and may be latent or include charges that are not displayed. Cost data available to SEADpod administrators is at the Project level only, at monthly granularity, split between general usage (storage, VMs, networking) and Databricks usage (if applicable) and does not include broader licensing costs.
NOTE: ABS will also provide a 6 monthly summary snapshot, which will include system usage that is visible in the system, as outlined above (storage, VM’s, networking), along with broader licensing charges (inc. Microsoft & Azure Active Directory). Additional invoicing will be considered at this point, based on how you’re tracking with a final true-up invoice at the end of the year or credit carry over.
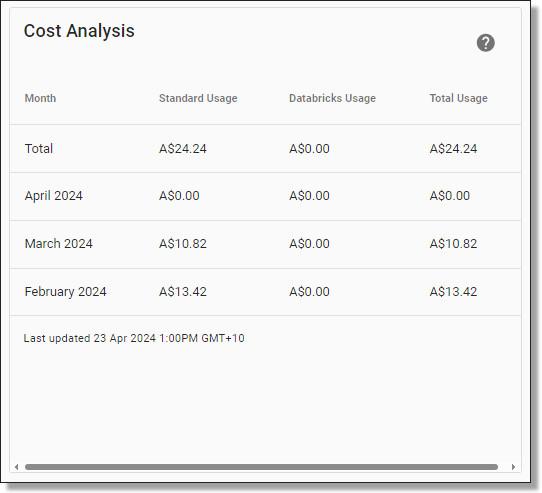
Fig. 4. Project Cost Analysis
Creating new projects
To create a new project, click on the ‘New Project’ button presented on the middle of the Projects page.

Fig. 1. ‘NEW PROJECT’ button
This will direct you to the New Project Form. The form contains four pages of required information spanning from Basics, Users, Products and Review. (Administrators should create dependant users or products before beginning this step). Once you have populated each page, navigate to the next page by clicking the ‘Next’ button on the bottom right of the screen. You can also navigate back to the previous page by clicking the ‘Back’ button beside it.
NOTE: Your Project ID should begin with your two or three letter (lowercase) SEADpod identifier (refer to Fig. 1.), followed by up to six spaces for your remaining numerical identifiers of choice (e.g. pb2332023)
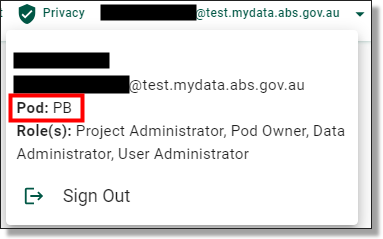
Fig. 2. SEADpod Identifier location
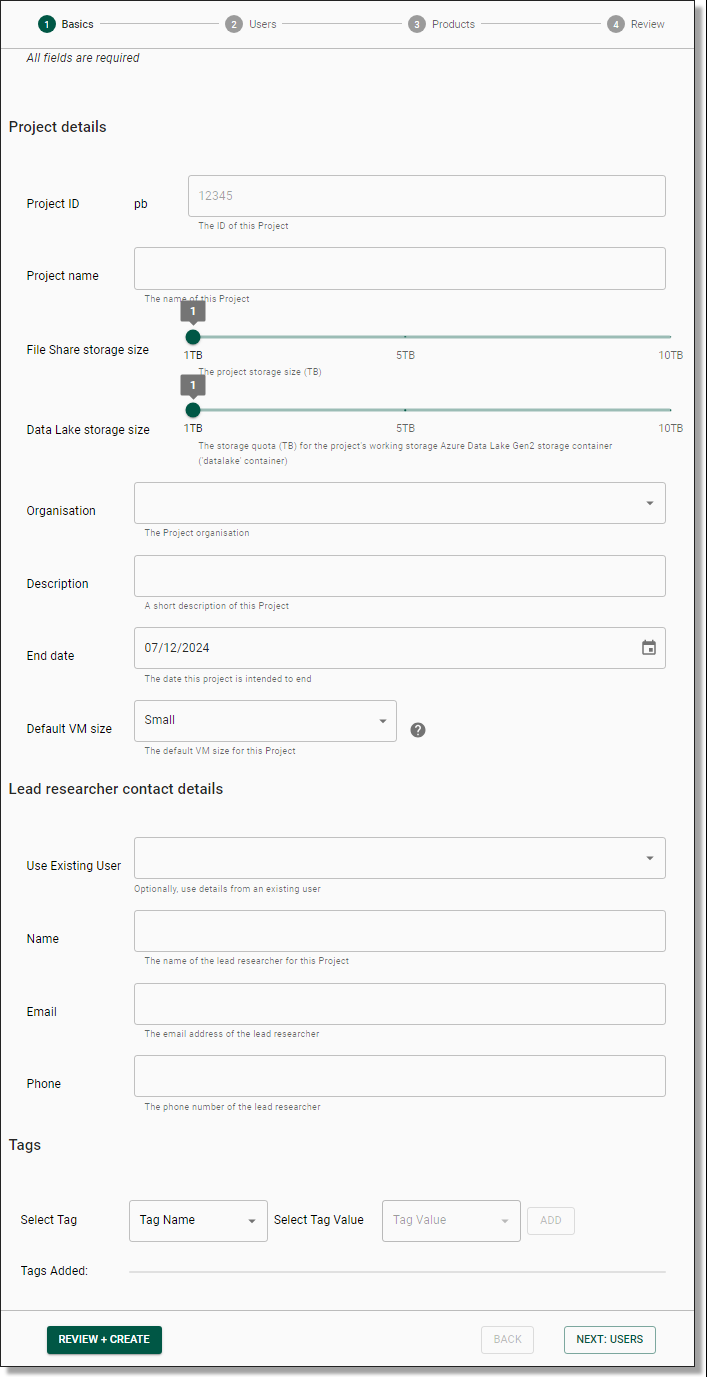
Fig. 3. New Project Form
NOTE: The Project ‘End-date’ is for management information only and does not impact user access post end-date.
Once you have progressed through the New Project Form, click on the ‘FINISH’ button that is now presented on the bottom right of your screen.

Fig. 4. New project finish button
Once you have pressed ‘FINISH’, you will be asked to confirm that you wish to create a new project, proceed by clicking ‘Yes’.
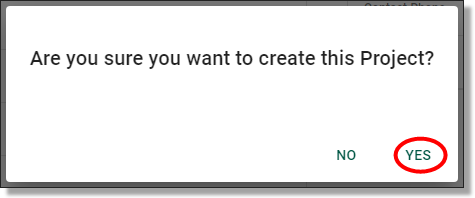
Fig. 5. New project confirmation
The system will then begin to create your new project, this may take up to 5 minutes to complete. You can view the progress of the task via the Action Log.

Fig. 6. Task action log
NOTE: Project folders are backed up each night and kept for 14 days.
Updating projects
You can modify a range of information about a project, including the default Virtual Machine size. To edit the information about a project, navigate to the projects tab and click on the hyperlinked project ID.
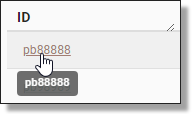
Fig. 1. Projects page hyperlink
Once you have clicked the hyperlinked project ID of the project you wish to edit, click on the green ‘EDIT’ button at the top of your screen.

Fig. 2. Project edit button
This will take you to the Update Project page where you can modify information about the project. Once you have completed your edits, click the ‘Save’ button to action these changes and update the project.
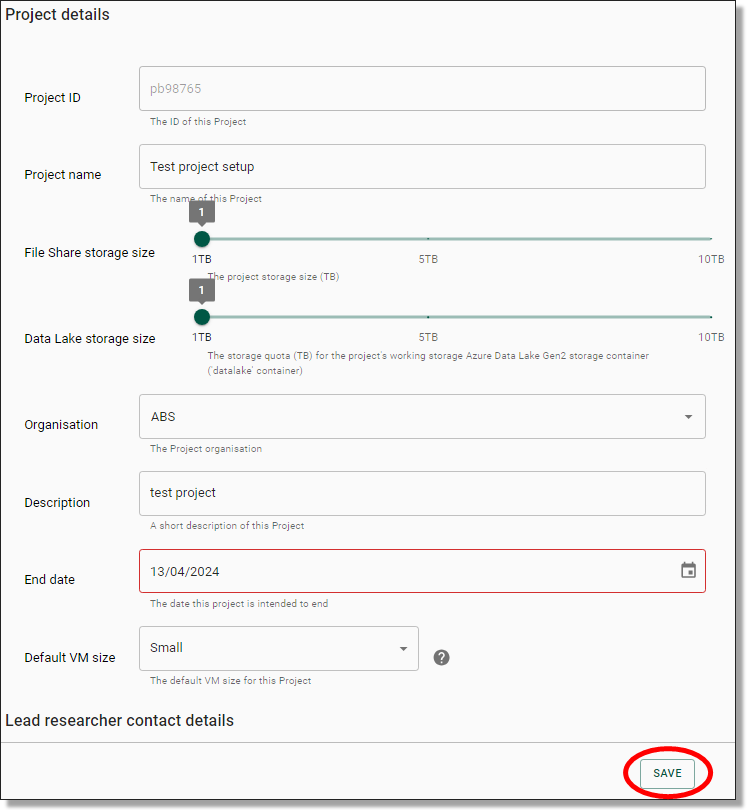
Fig. 3. ‘Save’ button from the project update page
Assigning users to a project
To assign a user to a project, navigate to that specific project’s page by clicking on the hyperlinked project ID.
Next, click the ‘ASSIGN USERS’ button at the top of the specific Project page.

Fig. 1. ‘ASSIGN USERS’ button
This will take you to the Assign User page, where you can add users to the project by selecting their accounts from the first drop-down menu (circled red). You can assign multiple users at once using the drop-down arrow (circled black). You will also need to select the size and type of the virtual machine for this user via the first (circled red) and second (circled blue) drop-down menus. You can select different VM versions (circled orange) depending on user specifications. Click the (?) icon next to each of these menus (circled green) for more information about the available sizes and types of machines available.
NOTE: The appropriate Virtual Machine size will depend on the needs of the user and the broader project requirements (e.g. whether SAS is needed, the number and complexity of the data files the user will be working with, etc.)
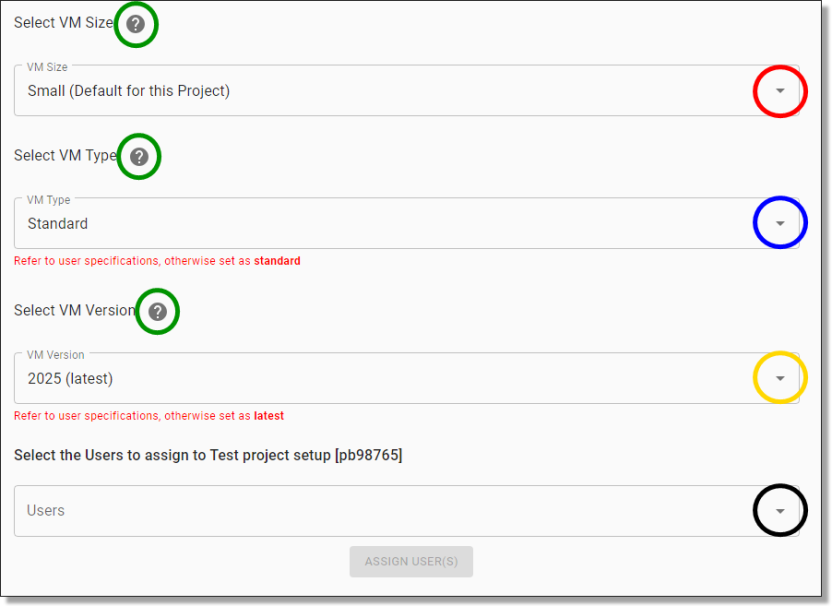
Fig. 2. Assigning users drop menu
Once you have selected the user and the appropriate virtual machine size and type, click the ‘ASSIGN USER(S)’ button at the bottom of the page to add this account to the project.

Fig. 3. ‘ASSIGN USER(S)’ button
Removing users from a project
Removing a user from a single project
To remove/unassign a user from a project, navigate to that specific project’s page by clicking on the hyperlinked project ID.
To unassign a user from a project, click the ‘REMOVE USERS’ button at the top of the specific project page.

Fig. 1. ‘REMOVE USERS’ button
This will take you to a drop-down menu where you can select the user you want to remove from the project. You can select multiple users at once. Once you’ve selected the user(s), click the ‘REMOVE USERS’ button below to detach the selected user(s) from the project.

Fig. 2. User removal drop menu
Once you have pressed ‘REMOVE USERS’, you will be asked to confirm that you wish to the user, proceed by clicking ‘Yes’.
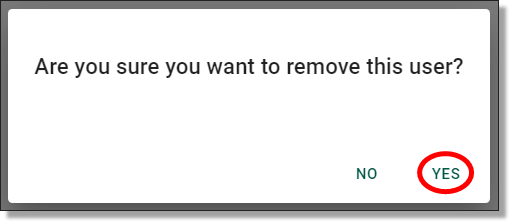
Fig. 3. Remove user confirmation
Removing a user from all projects
If a user is no longer required to have access to any projects, you can remove them from all projects. To do this, navigate to the Users page from the navigation panel on the left. A user must be removed from all projects before they can be evicted.

Fig. 4. Users navigation button
Locate the user from the existing list, or search from them using the search bar and clicking on the hyperlinked username which will direct you to that specific user’s information page.
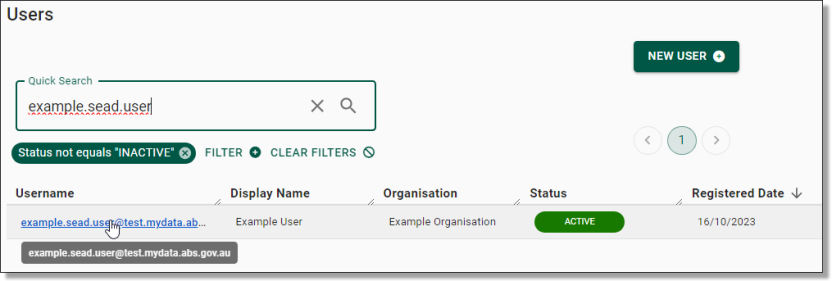
Fig. 5. Open user profile
To remove user from all projects, click on the ‘REMOVE FROM ALL PROJECTS’ button at the top/centre of the page.

Fig. 6. 'REMOVE FROM ALL PROJECTS' button
Once you have pressed ‘REMOVE FROM ALL PROJECTS’, you will be asked to confirm that you wish to remove the user from all projects. If removing the user from all projects is your intention, proceed by clicking ‘Yes’.
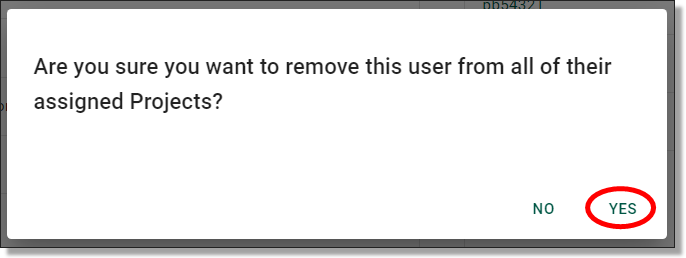
Fig. 7. remove user from all projects confirmation
Closing projects
To close a project, navigate to that specific project’s page by clicking on the hyperlinked project ID.
To close a project, click the ‘MORE…’ button next to the green ‘EDIT’ button at the top of the page and select ‘Close Project’. Ensure users on the project have requested clearance of all necessary files/data from their project before closing, refer to the note directly below regarding archiving and deletion.
NOTE: Closed Projects data will be archived after 180 days since their closed date and will continue to appear in Azure Storage Explorer during that time. After the 180 days, data from P: (Project) and O: (Output) file shares will be moved from the Project's storage account to a dedicated archive storage account. The Project's storage account will then be deleted, and the Project's status will be “ARCHIVED”. The ability to restore a Project will no longer be available after the 180 days grace period but archived data after the 180 days can be restored at a cost. Recovering archived data can only be performed by ABS System Administrators. Databricks Blob Storage will not be archived.

Fig. 1. ‘Close Project’ button
You will be asked to confirm that you wish to close the project, proceed by clicking ‘Yes’.
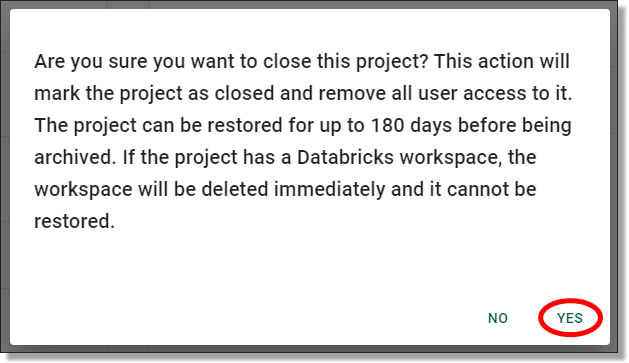
Fig. 2. Project closure confirmation
Cloning projects
You can start a new project based on an existing one by cloning the details and contents of it to a new one, saving time and effort. To do this, navigate to the project you wish to clone by clicking on the hyperlinked project ID.
To clone a project, click the ‘MORE…’ button next to the green ‘EDIT’ button at the top of the page and select ‘Copy details to a new Project’.

Fig. 1. ‘Copy details to a new Project’ button
This will direct you to a new project form which will be pre-filled with the selected project’s details. The only information that you will be required to update is the project ID, as the clone is simply a copy of an existing project, not a replacement.
Once you have progressed through the new project form, click on the ‘FINISH’ button that is now presented on the bottom right of your screen.
Once you have pressed ‘FINISH’, you will be asked to confirm that you wish to create this project, proceed by clicking ‘Yes’.
The system will then begin to create a new project encompassing all the details and contents of the cloned project. This may take up to 10-20 minutes to complete. You can view the progress of the task via the Action Log.