Getting started
Registering and logging into TableBuilder, introducing the home page
Register and log in
Register for an account for TableBuilder through Registration Centre.
Follow all instructions to activate your account. If you have issues activating, please check Troubleshooting or email microdata.access@abs.gov.au.
After activating, navigate to the Log into your accounts page and click on TableBuilder to log in.
Enter your user ID (a number) and your password. Your TableBuilder password is the same as the one you created in the Registration Centre when registering.
When you log in for the first time, you are asked to agree to Conditions of use for TableBuilder. It is important that you read and understand these conditions so that you are using TableBuilder appropriately.
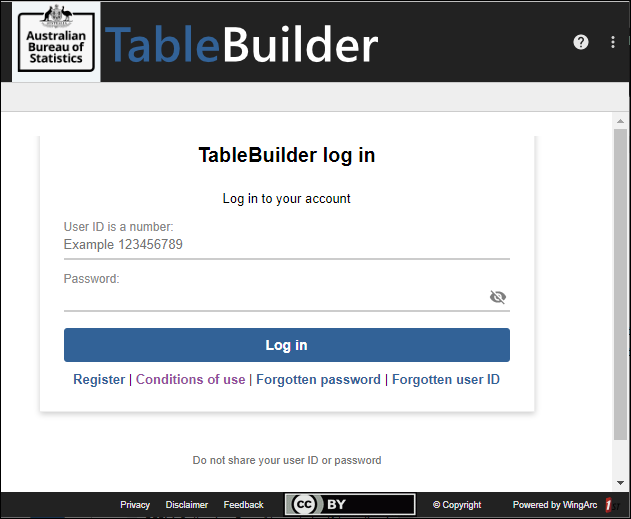
If you forget your credentials, you can use the 'forgotten' links on the log in page to retrieve your user ID or reset your password. You need access to the email address you registered with and your secret question and answer.
Contact microdata.access@abs.gov.au:
- if you can't remember your secret question and answer
- to unlock your account if you attempt to log in with the wrong password too many times
- if you have changed your email address (for example if you have moved to a new organisation or changed your name)
Taking the tour
When you open TableBuilder for the first time, a tour of TableBuilder features opens. The tour takes you through the home page features, saved tables, opening a dataset, creating a table, retrieving data and navigation.
To take the tour again, you can open it from the three vertical dots menu in the top right of the screen.
Home page features
There are a number of useful features on the TableBuilder home page.
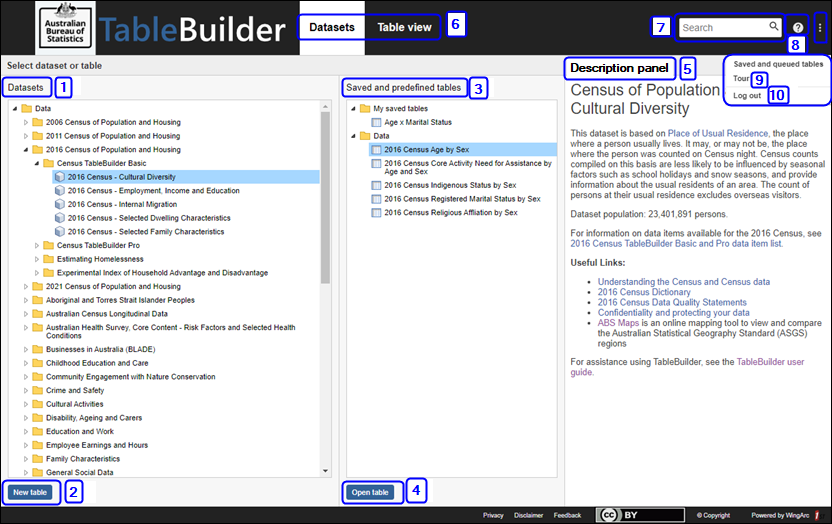
1. Datasets panel
This panel shows the catalogue of datasets that you have access to:
- see How to access to subscribe to additional data series
- click the arrow to expand the folder to display sub-folders (triangle icon) and datasets (cube icon)
- select a dataset with a single click to display any saved or predefined tables for this dataset in the middle panel, and additional information about the dataset in the third panel
- double-click on a dataset to open it and start creating a new table
2. New table button
Select a dataset in the Datasets panel, then click this button to start creating a new table. Alternatively, double-click on the dataset to open it.
3. Saved and predefined tables panel
This panel shows your saved tables and any pre-prepared (predefined) tables that are available for the selected dataset.
- Predefined tables are accessible to all users.
- Saved tables are tables you have saved and are only accessible by you.
When a dataset is selected in the Datasets panel, you can double-click on a table in the Saved and predefined tables panel to open and modify it.
4. Open table button
Select a table in the Saved and predefined tables panel, then click Open table to use and modify the selected table. Alternatively, double-click on the table to open it.
5. Description panel
The panel on the right provides general information about TableBuilder.
When a dataset is selected in the first panel and there is further information available about the dataset or its predefined tables, the information displays in the description panel.
6. Header bar menus
When you first open your TableBuilder session, the Datasets menu (the home page) is the only available menu. When you are on other screens, you can click on this menu to return to the home page.
After you open a dataset an additional menu appears for Table view. You can select this menu to return to your table for the dataset you have most recently opened.
7. Search
Use the Search box in the top right corner to search across all datasets that you have access to. The results show all datasets that include the search term in any field, including:
- dataset names
- your saved table names
- predefined tables
- variables
- categories
8. TableBuilder user guide
Access this user guide at any time by clicking on the question mark icon on the top right corner of the screen. The user guide opens in a new tab so you can click between the user guide and your session.
9. TableBuilder tour
The TableBuilder tour opens when you log into TableBuilder for the first time. You can take the tour again at any time by clicking on the three vertical dots menu in the top right of the screen.
10. Logging out
- Log out is located at the top right of the screen in the three vertical dots menu.
- Before logging out, save any data you want to retain.
- Logging out completely closes your TableBuilder session. If you only close your browser or tab without logging out, your session stays active until it times out.
Predefined tables
Some datasets have tables that have already been created and are available to all users. These are known as predefined tables. If there are predefined tables available for a dataset, they are displayed in the middle panel of the TableBuilder home page when the dataset is selected in the first panel. They can also be accessed by opening a dataset and clicking on the 'Saved and predefined tables' tab at the top of the left panel.
Predefined tables can be used as a starting point and be further modified as required. Predefined tables can be saved or downloaded like any other table.
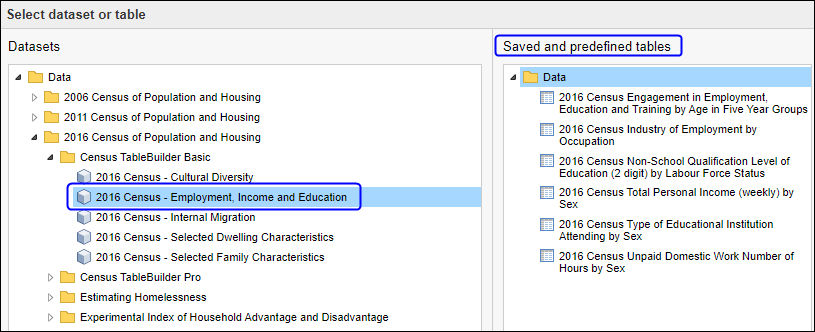
1. For example, the Census TableBuilder Basic dataset 2016 Census - Employment, Income and Education has six predefined tables.
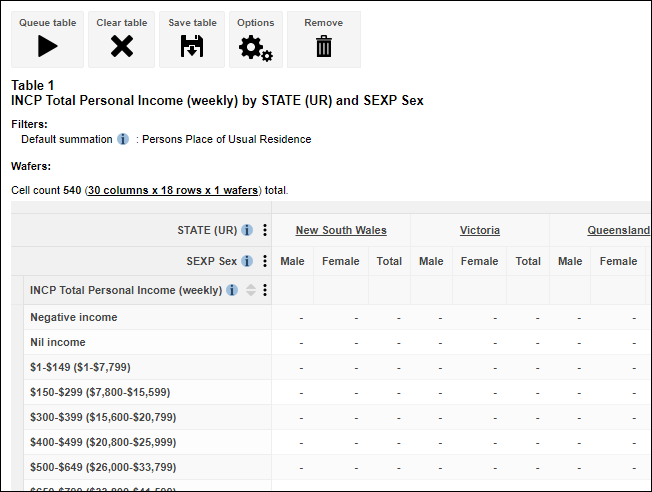
2. Double click on the 2016 Census Total Personal Income (weekly) by Sex predefined table to open a table showing State by Sex by Total Personal Income (weekly) variables.
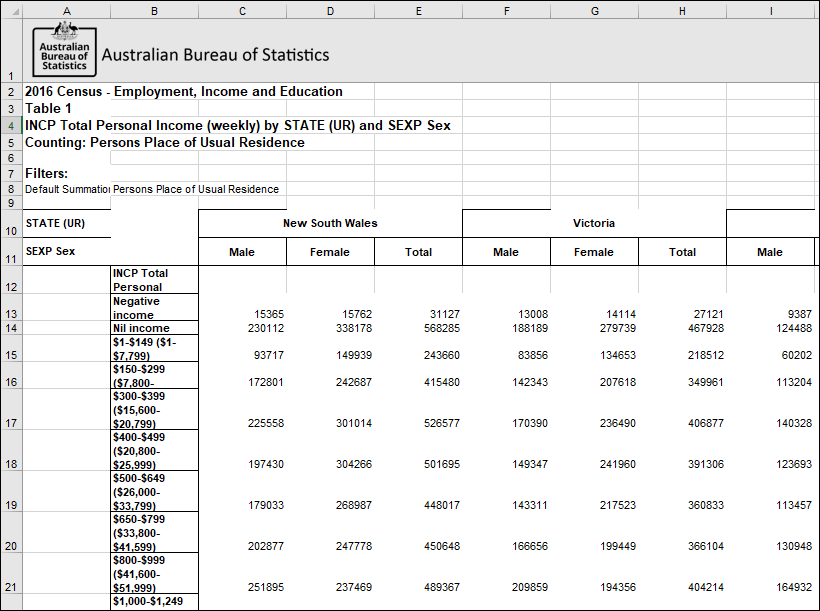
3. Queue the table to retrieve and download the data.
Session timeout
If there has been no activity in TableBuilder for 30 minutes, the session times out. The following message displays and you need to log in again to continue working. Any unsaved data is lost.
